Sunday, January 31, 2010

Chichiquelites, Garden Huckleberry (solanum nigrum)


I like to experiement in the garden. Growing unusual, often old and forgotten, plants is a joy. I never plant those ordinary annual flowers people seem to buy in flats and stick in their gardens and I like to grow heirloom vegetables, who's seed I can save to grow from year to year. This saves me a lot of money in seed each spring.


One of the things I have discovered this spring are chichiquelites, also known as garden huckleberries (
solanum nigrum). I got these seeds in a trade and, having never heard of them previously I did some research.


I am always looking for good to eat and easy to grow quickly, fruits for wine and pie making. These sounded perfect! They also make good jam, but we don't eat a lot of jam so I will be using them for pies and wine.


They need more sweetening than blueberries, but I am ok with that. I will add a bit more sugar to the pies.


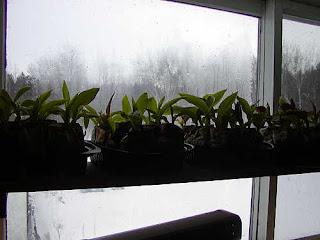
They are easy to grow from seed, not requiring stratification. I know this because I have some seedlings sprouted on my seed windowsill. I have heard from other growers that they grow quickly, without a lot of care, into huge shrubs covered with berries. This is what I am hoping for. I will can and/or freeze all that I can get, if we like them. I will also collect more seeds to grow again next year. They will apparently reseed themselves anyway but I prefer to plant them from seed myself. Being a close relative of the poisonous nightshade berry, I would prefer to know exactly where they are growing.


They have medicinal uses, as well. This is a quote from Wikipedia regarding solanum nigrum:
"The plant has a long history of medicinal usage, dating back to ancient Greece. This plant is also known as Peddakasha pandla koora in Telangana region. This plant's leaves are used to treat mouth ulcers that happen during winter periods of Tamil Nadu, India. Chinese experiments confirm that the plant inhibits growth of cervical carcinoma (Fitoterapia, 79, 2008, № 7-8, 548-556)."

I am hoping for great things from this new and little known berry!

Spring Seeding 2010


Spring is not here yet, however I can get a head start on it by planting some seeds indoors.Actually, I started seed about two months ago, during the Christmas holidays. These were canna seeds that I got in a trade. I planted about 100 seeds early because I thought they would take a couple of months to germinate. I was wrong. After treatment and planting they all sprouted in less than two weeks and are about 2" high now in the seed window. I planted every single seed because they are all hydrids and cross pollinated. I want a few special cannas with coloured and striped leaves and various flowers. Most will be the standard green leaves with red flowers which I will probably give away, but I will keep any special ones.

I know these will do well indoors until they can go into the cold frame as I have a couple that I have grown indoors in pots since I dug them up in the fall. These are doing very well.

If you want more information about starting cannas from seed, you can find it in my previous post on spring seeding.


These are ground cherries sprouted in the
seed window.


In the past month I have planted many of my vegetable and flower seeds and have them growing under lights in the south seed window. I can start tomatoes and peppers this early because I have lights in the window to supplement the day light and I have a cold frame to move them into mid April. The window lights are only on for a few hours in the morning and a few hours in the evening, giving them a longer day. I am looking for a more permanent indoor lighting set up at the moment.


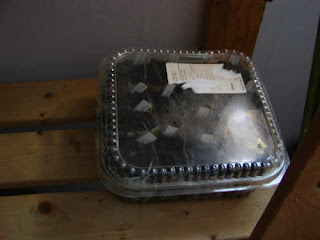
These are garlic chives, just barely poking their heads above the ground.


Peppers are not up yet. They take longer to germinate.


I have planted so far this year: chives, garlic chives, ground cherries, rupine brussel sprouts, chichiquelites, several types of tomatoes, several types of peppers, cannas, bird of paradise, heuchera black magic, white and lilac datura, allium blue drumstick, dianthus siberian blue, canpanula cup and saucer, sea holly and gaillardia. Some are up and some are not.I have also potted up some tender bulbs. I noticed that my best dahlias were drying up in the basement, so I potted them. I also potted special cannas, callas, elephant ears, other dahlias. I bought some edoes at the grocery store and potted those too.


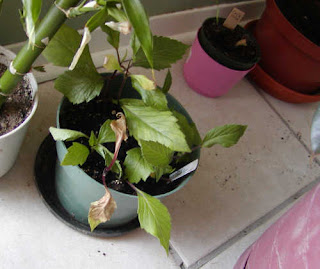
I grew two dahlias in pots over the winter and they have done well, so far. As they get leggy I just cut them off and root the cuttings.


I recently acquired a couple of aquariums. This very large one will make a great little greenhouse for the peppers this spring!


I have many, many more seeds to plant indoors soon, which is one reason I wanted to start so early. It is probably going to take me that long to get them all planted!
We will still have vegetables that go directly into the garden, i.e. peas, beans, corn, cucumbers, potatoes and squash. I have a few new varieties of squash, Hopi black and Hopi pale gray, that I will be starting early indoors, as well.

All in all, I have been pleased with the results so far. The seeds are growing in the spare room at the top of the stairs, over the wood stove, so it is one of the warmest rooms in the house. It is also my studio, craft, storage and work room, so I am in there quite a bit. I love working in the "jungle"!

Sunday, January 24, 2010

Making pies without a recipe


All through my youth, I thought a recipe was necessary to make a pies. If I came across fruit or berries on sale, I would first have to find a recipe for that particular one before I could make a pie with it. After years of practice I have hit on a method that works for me.

Pastry is easy with the directions on my Farm Baking blog post.

It is the filling I had trouble with until I developed this simple system.

Pie filling is basically prepared fruit and/or berries plus sugar and flour. You will need about 8 cups of prepared fruit that is washed, hulled, cleaned, cored, peeled and ready to put into the pie. The flour is to thicken it so you don't have runny pies and the sugar is purely for taste.

How much of each depends on your filling. You be the judge of how sweet you want it. I use 1 to 2 cups of sugar for every standard 9" pie made with fruit or berries. I put 1.5 cups of sugar in a blueberry pie.

How much flour depends on how juicy the filling is. Again you have to judge the juciness. I use between 4 and 6 tablespoons of flour for every standard 9" pie. Where the juciness is concerned, I find it is better to use a little more than too little. No one likes a runny pie. You cannot judge how runny it is while it is very hot, however. Let it cool to just warm before making that judgement and adjusting the amount in the next one or the cooking time. If you have put in the 6 tablespoons of flour and it is runny, you probably haven't cooked it long enough.


You can bake the filling in a pie without burning the crust if you cover the entire pie with aluminum foil. If the pastry is getting dark and the filling is not done, cover the entire pie and bake longer.

If your most common problem in pie making is getting the filling completely cooked so that the fruit is soft and the juice is thickened but the pastry is not yet burned, try heating the filling up to the boiling point before your put it into the pastry. Only do this if it is going directly into the oven. The boiling filling will melt the fat in the pastry if you let it sit long like that without baking.

Today I made four blueberry pies. I found frozen whole blueberries at Costco for a good price. I made the pastry yesterday. I baked one and put the other three in the freezer.

Pies taste just as good after freezing as they do fresh if they are frozen BEFORE THEY ARE BAKED. The quality suffers a lot if you freeze fruit and berry pies after baking. The filling will be fine but the pastry will be soggy.

Another tip: Do not keep fruit or berry pies in the refrigerator. This will also make the pastry soggy. I cover mine with plastic wrap and keep it on the counter or on top of the fridge.


Thank goodness cats don't eat fruit pie! He might be tempted to eat squash pie with all the eggs in it, but those go in the fridge.

He is sleeping in a kitchen chair. His usual perch when I am in the kitchen working, is on the corner of the table, watching me. Yes, my cat sits on the table. We don't actually EAT on the kitchen table. (Does anyone?)

With these easy directions you can make pie out of anything. You can mix the filling as in peach/pecan or apple/maple/walnut with caramel drizzed on top. Use your imagination. If you have some fruit, but not quite enough, add some nuts and raisins to it. Use roasted hulled sunflower seeds in place of nuts in a pie. No one will know they are not nuts. You might also try substituting a little of the flour in the pastry with finely ground pecans. You can top the filling with bits of butter before putting the pastry on top. There are many, many variations you can make with this simple system for pie filling.

Friday, January 22, 2010

Make Your Own Cultured Buttermilk


Hubby loves buttermilk but buttermilk is expensive, unless you can find it on sale. With this in mind, I have been looking into making our own. I came caross a reference to homemade cultured buttermilk by accident about a month ago and that started the chain of research on the subject. Why should culturing bettermilk be difficult. I have been making yogurt for decades. Can this milk culture be any more difficult?

It isn't. Its easier. The culture that makes "cultured" buttermilk will grow at room temperature! That makes it a lot easier to make than yogurt. No warming the milk and keeping it at that warmer temp for eight hours.


This is not real buttermilk. Real buttermilk is what farmers pour off the butter after churning. This is, however, what most people drink from the grocery store, called "cultured" buttermilk. It is a mesophilic culture growing in milk. This is the same culture used to make many cheeses.

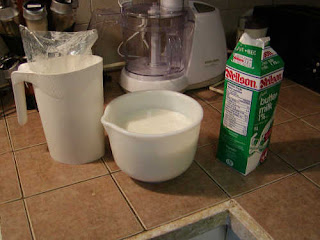
I bought a small container of cultered buttermilk at the store. It is important to buy one with live culture. Only a small portion of this is needed to turn a bowl of milk into cultured buttermilk. The process takes about 24 hours at room temperature.
I used storebought 2% milk and let a bowl of it warm to room temperature. I then added about a 2" square amount of buttermilk and left it for 24 hours.


Ta-da! Buttermilk! Thick and delicious!


You can freeze the buttermilk in small pieces, like in an ice cube tray, to use for baking. It is no longer suitable as starter for more buttermilk after it has been frozen. You won't want to drink it after freezing, either.


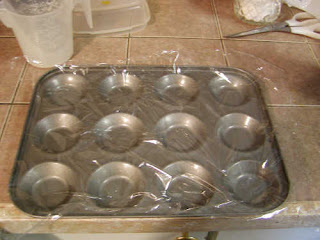
I don't have ice cube trays, so I put a piece of plastic wrap across the top of a tiny muffin pan and poured buttermilk into each one. I set this in the freezer. When they were hard I put them all in a freezer bag and put back in the freezer. Now I can take out as much as I need for a recipe.

Because we turn our heat down at night, our kitchen is a lot colder than "room temperature". For this reason I left it an extra half day. The next time I make it I will put it in the yogurt maker so the temperature will stay constant. My yogurt maker is a gallon tub in a styrofoam container made for it.