Thursday, December 30, 2010

E-Books


I have written a few e-books in the past year. I am hoping that "Making Organic Soap At Home" will become a favoirite book for homesteaders.


I have started writing another book entitled: "Keeping A Few Chickens At Home". I'd like to continue writing this series of "At Home" books for those on the journey to a more self sufficient lifestyle.
I am going to sell these on our new website. You can purchase these through our E-Book page - one of the tabs at the top of the screen.


I know there are those out there who are trying hard to make ends meet while doing what they can to live a healthier and more self sufficient lifestyle. I hope this will help those families.


Monday, December 27, 2010

Edible Weeds


Recognise this garden weed? It's called purslane and grows everywhere. I usually find it growing wild in disturbed soil and in the garden. It's one wild plant that I don't pull out but encourage to grow. It's a great succulent ground cover and is not a weed!

According to a Canadian Living article, nutritionally, purslane is a powerhouse. It has more than double the omega-3s that kale has and, as much as any other leafy green. It has over four times the vitamin E of turnip leaves which is more than most leafy greens. It has glutathione and other antioxidants and about as much iron as spinach. It also has reasonable amounts of other nutrients as well as phytochemicals, like all these leafy greens.


I like it because it is a succulent, so it doesn't wilt and will stay fresh for a long time with just a little water.

I recently began researching the weeds growing everywhere on our property (more in an attempt to get rid of them than anything else.) What I found is that many of them are not only edible but very high in vitamins and desirable phytochemicals!

Another so called "weed" that I have growing everywhere is wild mallow. The leaves and seed pods are good in salad and cooked in soups and stews. Mallows have a lot of vitamin A in their leaves too! The seeds are very high in protein, making them an excellent part of your chicken feed, as well.


The wild mallow that I have everywhere is malva sylvestris but I also grow malva moschata in the flowerbed, another mallow and close relative. It has the same vitamin content as it's cousin, the wild mallow. The leaves of both mallows are great in salad and cooked in spaghetti and lasagna if short on spinach. We eat them all the time.
Violet leaves also make a mild, healthy addition to salad.

This research into the "weeds" growing here has been the start of an
herb seed business for me. I have been blessed with many herbs growing in the fields. I have an abundance of evening primrose, heal-all, St. John's wort, motherwort, burdock, chicory, yarrow, feverfew, celandine, clover, bladder campion, plantago and many more. Many of these have been transplanted to an "herb" garden or an area where they are protected. Some, such as burdock, are edible in salads and cooking.

So the next time you see something you consider a "weed", look it up and do some research. You might find your next healty salad green growing wild in your garden! Leave it alone and let it spread, transplant it to a better place or pick and add to your salad along with violet and mallow leaves.

Friday, December 24, 2010

Muffins for Christmas


This year I have decided to give my inlaws muffins for Christmas. They are elderly and it's just the two of them so she doesn't bake much anymore. They still enjoy baked goods, especially muffins, so I am giving them nine muffins from each of my very best muffin recipes. I baked them all just this week so they would be fresh. I frose them as soon as they were cool to keep them fresh. I took them out of the freezer this morning and they will get them tomorrow so they will be well thawed.

I made carrot/raisin, sour cream blueberry, banana and squash/pumpkin. The recipes are below. They refreeze well. None of these muffins are low-cal and all are made with real food, real butter, milk, eggs and sugar. (One loaf of white Wonderbread lasts for three weeks in the cupboard at room temp without molding! At first I said "Great!". Now I say, "Wait a minute. Is that real food?". Uh, no.)

I baked carrot-raisin-sunflower seeds (pictures here). This is the most delicious, moist, dense carrot muffin I have ever eaten. It's delicious and has a lot of texture and carrot in it.


Here are the recipes:

Carrot Raisin Muffins

3 cups grated carrot
4 large eggs
2 cups flour
2 teaspoons baking soda
1 teaspoon salt
2 1/2 teaspoons cinnamon
1 teaspoon vanilla
1 1/2 cups sugar
1 1/4 cups oil
1 cup golden raisins
1 1/2 cups sunflower seeds or nuts

Directions: Preheat oven to 300F. You will need 3 large bowls for this recipe.
Bowl #1: Mix grated carrot, seeds and raisins
Bowl #2: Mix flour, soda, salt and cinnamon
Bowl #3: Mix sugar and oil. Add eggs, one at a time, mixing for 30 seconds after each one. Add flour mixture to this and stir only until well blended. Add carrot mix and fold in gently. Fill greased muffin tin or papers 2/3 full. Bake 20-22 mins for very large muffins. Insert a toothpick into the center of the largest one to test for doneness. If it comes out dry and clean, the muffins are done.

Blueberry Sour Cream Muffins

2 eggs
1 cup sugar
1/2 cup oil
1/2 teaspoon vanilla
2 cups flour
1/2 teaspoon salt
1/2 teasppon baking powder
1 cup sour cream
1 cup blueberries

Directions: Beat eggs, gradually add sugar. While beating, slowly add oil and vanilla. Combine dry ingredients in a separate bowl. Add alternately with sour cream to the egg. Gently fold in blueberries. Bake in preheated oven at 400F for 18-20 mins in muffins papers or greased pan for very large muffins. Insert a toothpick into the center of the largest one to test for doneness. If it comes out dry and clean, the muffins are done.
Banana Muffins

2 cups flour
2 teaspoons baking powder
1 teaspoon baking soda
1 cup white sugar
2 cups mashed bananas, very ripe (4-5 lg bananas)
1 cup mayonnaise

Directions: Mix first 4 ingredients together well. Fold in bananas and mayonnaise. Bake at 350F for 12-14 mins in muffins papers or greased pan for very large muffins. Insert a toothpick into the center of the largest one to test for doneness. If it comes out dry and clean, the muffins are done.

Pumpkin Muffins

1 cup cooked squash or pumpkin
1/3 cup oil
1/4 cup corn syrup
3 teaspoons baking powder
1/2 teaspoon cinnamon
1/4 teaspoon nutmeg
1 cup sugar
2 eggs
2 cups flour
1/2 teaspoon salt
1/2 teaspoon ginger
1/4 teaspoon mace

Directions: Preheat oven to 350F. Mix together pumpkin, eggs, oil and corn syrup in large bowl. Stir until well mixed. Stir all other dry ingredients together in another bowl. Add dry ingredients to squash mixture. Fill greased tins or papers to the top. Bake in preheated oven for 20-15 minutes until tightly brown on top very large muffins. Insert a toothpick into the center of the largest one to test for doneness. If it comes out dry and clean, the muffins are done.

Friday, December 17, 2010

The Best Spice Jars Ever Made

For years I have searched for the perfect spice jars, or, at least some that I could work with. Most spice jars that I have had were not all that convenient to use. They either had a small opening, making it difficult to fill and impossible to get a teaspoon into or they were not in a convenient holder and were too hard to find at a glance and they were always in the way.


This is a jar from the set I bought last year. I can't get a teaspoon into it. What am I suppose to do with that? If I need 2 teaspoons of something I have to use the 1/2 teaspoon 4 times! What if I need a tablespoon? I always make a mess filling them. I don't like the way they open anyway and they are hard to find in the holder at a glance.


I recently visited a friend's place, Janet, and found the perfect spice jar! It's metal and has a glass top.


These spice jars have a pour and a sprinkle area on the side of the lid.They also have a large mouth. I could get a tablespoon in there, easy! They are easy to fill and with the name painted on the lid, they are easy to find at a glance.

All of these things are good, but that is not what makes this jar so special. This jar is MAGNETIC! You can put a metal plate on your wall for them to stick to or you can just attach them to 

anything metal.


They stick to my microwave! I could keep them there but that's not the best place to 

keep them.


They stick to my coffee maker. (Probably not a 
good idea.)


I can stick them on my oven!


I can stick them to my freezer!


I can even stick them to my car!! (Maybe not.)


I stuck all of them to my refrigerator! They are even in alphabetical order. I can read the name at a glace because I painted it on there myself. There's lots of room and I can see what

is inside.

Another good thing about these jars is the price. They were only $2 each! I'm going to get a lot of them and keep all kinds of things in them, stuck to the refrigerator. I LOVE my new toy!

Thursday, December 16, 2010

Fabulous Banana Muffins!


These truly are the best banana muffins I have ever eaten! They are dense, moist and have a lot of banana flavour while still rising quite high.


Here is the recipe:

2 cups all purpose flour
2 teaspoons baking powder
1 teaspoon baking soda
1 cup white sugar
2 cups mashed bananas (about 4-5 large bananas)
1 cup mayonnaise (Please use real mayonnaise here!)
1 cup chopped walnuts or sunflower seeds (optional)

Mix the dry ingredients together. Gently stir in the bananas and mayo. Fill the muffin cups full and bake in a preheated over at 350F for about 15 minutes if making small muffins. If making large ones (like the ones in these pictures) bake for 20-25 minutes. These are very large and took the full 25 minutes. Stick a toothpick into the center of the largest muffin. If it comes out dry they are done.


Instead of walnuts, I often use dried impatiens gladulifera seeds. They taste just like walnuts and I grow a lot of them. They are good for you too!

I will need to make more muffins tomorrow. I plan to make several different kinds. I am making these again with nuts or glandulifera seeds, some squash muffins and some oatmeal/apple/cinnamon/maple muffins that we like. Muffins sell well around here. They are great for lunches!

Its a good way to use up all that squash too.


Monday, December 13, 2010

The Last of the Squash


This is the last of this year's squash from the basement cold cellar. The rest has been processed for the freezer, made into pies or given away. Some of these will last much longer, even into the new year but I am going to put them all into the freezer this week.

I had that job on the agenda for today, but, well, I just didn't feel like doing that. I'll do it tomorrow. (There's always tomorrow...) I made a massive lasagna and some apple, oatmeal, maple muffins today, as well as other things such as playing in the field with Buck to get him some exercise (in 2.5 ft of snow) and blowing out the the driveway, so I don't feel like the time was wasted. I also made a trip to the grocery store and the Bulk Barn. The Bulk Barn is my new favouite store! I could look for half a day and spend half a fortune in there! Shopping in the bulk food store makes me want to bake.

This is a new muffin recipe so I have no idea if they will be good or not. The recipe only made eight large muffins. If they turn out well I will make more soon and post it here. They sound good with the maple syrup in them. I love maple! It's my favourite flavour! It ranks at the top with very dark chocolate and dark chocolate-raspberry combinations, so I'm sure I'll like them but I won't be the one eating most of them. Hubby will be, so, we'll see how they do. They are in the oven right now, so I don't even know if I like them yet. They sure do smell good!

Tomorrow I will bake or peel and boil
these squash.

Tuesday, December 7, 2010

Snow!


It snowed and its still snowing and will continue to snow, apparently, all week long. This is my poor chicken house, buried. I'm glad we don't have chickens right now and have opted not to get any this winter.

This is what I am installing an electric fence in!! The ground is not frozen yet, thank goodness, or I'd be getting nowhere fast! As it is, it's cold. It's several degrees below freezing with a big wind. Thankfully, I have outdoor wear just for this kind of thing! I bought farmgirl boots last spring that are 100% waterproof, have a steel shank and toe and are good to -40! They're great boots! I had to order them special because the store didn't carry my size but they delivered them to my door with no extra charge. That's good service!
My poor dahlia chair is half buried. Doesn't it look cold and forgotten?


This is the barbecue. I don't think we'll be using it anytime soon, but one never knows.


And this is my poor car. It's not made for driving in deep snow, even with the snow tires but it works better on the slippery roads than the truck. The truck only has front wheel drive. We put weight in the back of it in the winter to help with the traction.

I got the snow blower out of the garage summer storage a couple of weeks ago and parked it next to the driveway where we keep it in winter. Hubby put new gas in it and got it going a few days ago. Just in time!

I don't mind it for a few weeks, unfortunately it lasts much longer than that! I'm sick of winter by the time spring comes! It always catches me by surprise when I still have things to do. I'm never really ready for it.

Most of the posts and wire holders for the fence are already in place, just need to fill a few gaps with "hammer-in" metal posts before the ground freezes. I'm using a few trees too, which are already there.

This snow is making it hard to drive anywhere. The city doesn't have full time snow plow drivers until after Dec 15th so the first few snowfalls bring traffic to a standstill. The school buses have been cancelled for the past two days. This makes hubby happy as he drives one and gets paid to stay home.

I had to clean my mailbox out of the ditch for the first time yesterday, after the snow plow took it out. That's always a winter harbinger for us.

Well, it's December in Ontario...

Tuesday, November 23, 2010

Pets, Worming and Fences

Well, it has been decided - we are getting a hot wire for a fence to keep Buck in. We hope to have it installed within the next two weeks. We'll just bite the bullet and put it in. I think we can manage to keep it clear of growth. Maybe I will put cardboard and mulch under it all the way around to keep anything from growing there. I can also dump the wood ashes in the tough spots to kill the growth without poisoning the ground or animals. Salt works well too. We'll have to cut back all those blackberry bushes!

How high should the wire be and what do we do about the 2-3 ft of snow? Will the snow drifts over it short it out?

We just have to get through the next couple of weeks with Buck chained a lot. He's unhappy and, therefore, so are we. He's the joy of our lives right now and we'd do just about anything for him - except let him wander free around the neighborhood.

We take him outside and play every day. I let him run around with me when I am outside but I have to keep him in sight or he will quietly sneak off and go through the fence. I think I have found where he is getting out and will fix those couple of spots today. Then we'll see how it goes. He will have to be chained when we cannot keep an eye on him, at least until we get the electric wire in place.

I wormed the pets today, all three of them. I know that roundworm powder package says that it's easy with no vomiting or wrestling with the critters (I paraphrased). I have used this roundworm powder about every three months, since
Abby came to us about a year ago.

I wasted an entire box the first time, following the directions. The paper that comes in the box says that you take the food away until the pet is hungry. Then give them a little, put the worm powder in the remainder, then let them finish it. Not fuss, no mess, no vomiting, no hassle, etc. etc. etc.

Ha!

Both Abby and
Shadow turn their noses up at anything with that powder in it. They simply will not eat it. I have even put it in tuna and they wouldn't eat it and they LOVE tuna! All I have to do is start opening a tuna can and I have two cats at my feet. It's not the can opener, it's the tuna. They love it - but not with the worm medicine in it.

So, I came up with a plan several months ago. I dissolve the powder in a little water and put it into a syringe. I then squirt this liquid into the back of the cats mouth. Of course, I have to hold each one wrapped up tightly and wrestle with the critter to get it all down. I only squirt a little at a time, giving them the opportunity to swallow it. I have done this a couple of times in the past year and it works ok, of course, both cats were just born summer 2009, so have not been very big at the past wormings.

This method seems to work well for Abby the tabby. She is still quite small and light. Usually Abby is the feisty one, biting when she wants down and always grabbing and playing, but a real sweetie and dear to our hearts! When I wrapped her up tightly in my polar fleece sweater, she just snuggled down into it and relaxed. I think she liked it, at least until I start forcing her to swallow that horrid stuff.

She doesn't like that.

Shadow on the other hand, is usually very mild. We call him the "Little Gentleman" because he is always so polite and easy going. He never shows a claw or bad attitude to anyone, not even Buck. He and Buck have become buddies, sort of. He will purr and rub against Buck and hang with him, until Buck starts to play rough, then Shadow runs away. Shadow purrs all the time whenever anyone comes near. He loves everyone and puts up with anything, always purring - HOWEVER - he has grown into a very large, stocky and unbelievably strong fellow. I didn't realize how strong until I tried to wrap him up and feed him the worm medicine with a syringe. It become immediately clear to me just how much muscle he had grown since the last time. I got a deep long gash of a scratch, but did manage to get it all into him, on him and on me. I gave him and extra half dose for this reason.

He forgave me and purred when I came to see him later to ask his forgiveness for having to put him through that and, as usual, I cleaned up cat barf this morning.

What do other people use to rid their cats of roundworms? There has got to be something easier that doesn't cost an arm and a leg or a visit to the vet!

Giving worm medicine to Buck was a piece of cake, or a muffin as it turned out to be. He just gobbled it all up and licked anything left behind. It went down totally unnoticed and as quick as a wink. I don't think he would need it if he would just quit EATING THE CAT POOP out of the litter box! Dogs! You would never catch Shadow doing that! He's too high falutin' to eat anything other than cat food and fish. Shadow won't even eat raw hamburger!

So all three pets get wormed at the same time.

Abby the Tabby, on the other hand, will eat whatever she sees Buck eating. She ate an entire dry cracker a couple of weeks ago because Buck got one! Abby and Buck are not friends - not at all. He would love to play with her but she's just too little and won't put up with anything from him. She won't back down either, so this usually results in Buck getting a few clawed swats on the nose whenever he gets near her. He has learned to just back off and ignore her.

He absolutely adores Shadow! I'm glad Shadow has learned to be friendly with Buck. It's so sweet!

Here are my questions:

1)Is there something easier that I can use to rid my cats of roundworm without a vet visit? (Cats don't eat pumpkin seeds or garlic.)

2)How high do I need to put the electric wire?
3)Will the snow drifts short out the electric wire and how do we overcome this problem - It is not possible to keep it shovelled all around the 3.5 acres of fence. Perhaps a higher, second, separate system wire, turning the bottom one off in winter?

Any help will be greatly appreciated!!
I apologize for the lack of pictures. (I will add some later.)

Monday, November 22, 2010

Soap Making and Buck


I have been making soap for the Craft Fair on Dec 4th. I made three small batches just this morning and a few last week. I am cooking it so it will be ready to use. Soapmaking is fun and so addictive!! I took this picture (above) of my soap last year. It's for my book on "Making Organic Soap at Home" that I have for sale on my farm site. I like doing photo shoots of things. It's a fun hobby!

This is one shelf in the soap closet in the bathroom where I dry all my soap. It contains strawberry, lilac and "blueberry pie". The strawberry is not as pink as I would like. It's a bit too peachy buy I have always had a problem getting a good strawberry soap colour. I have had good, pink soap before but it always seems to be something other than strawberry. When I aim for real pink, I can't get it. Oh well, "Murphy's Law". If anyone finds out where this "Murphy" lives, please let me know. I have a thing or two to say to that fellow!


The "Blueberry pie" soap is my favourite this year! It was a rebatching experiment to save a soap with a colour that I did not like. I am very happy with the way it turned out!


This is the other shelf in my soap closet with this year's soap on it. It contains "almond biscotti", coconut, "healing herb" and "sweet orange". The "healing herb" soap is made with oil of oregano and thyme - both natural antibiotics. Some of these soaps are made with milk, which is why they are browner.


The "almond biscotti" is my favourite soap scent! It's amazing and always sells out first.

These are for the craft fair at Base Borden on December 4th. I now have all the pumpkin pies, brown sugar body scrub and soaps completed for the sale. I like to have it done ahead of time. I am a bit rushed this year, but next year I am going to start in January making things for the fall sales! I always say that...

Saturday, November 13, 2010

The Perfect Squash


Those of you who read this blog regularly will know that I like to grow squash, lots of squash. Over the past couple of years I have grown many different kinds in search of the perfect squash. Well, I think I have found it!


This is the Hopi Black squash. It's very large! I know it's not black now, but it is black when it's young, as it is in this picture.


It is as large as a big hubbard, but the skin is easier to peel and can be cut with a knife, as opposed to an axe. I have to use an axe or a hammer to cut into a hubbard squash.

The Hopi Black squash is very sweet, dense and delicious. It has a small seed cavity with a lot of meat.


The meat is a much darker orange than any squash I have seen. There's a big difference in the colour. Does this mean it has more beta carrotene? I wish I could find more information on that!


This is a very old, rare and hard to find heirloom squash. It was grown by the Hopi Indians generations ago. It produced as much cooked and finished squash for the freezer as I got from 4-5 small ambercups.

This will be the only squash I grow for our family in the future. It's very large, meaty, soft skinned, sweet, delicious and easy to grow. It does have a long growing season so I will start them early indoors, but that's fun anyway.

I may plant many different types in the big field next year for a "pic your own" squash and pumpkin field...maybe, but this will be the only one I grow for processing by us.

Saturday, October 23, 2010

Cooking Squash & Making Muffins


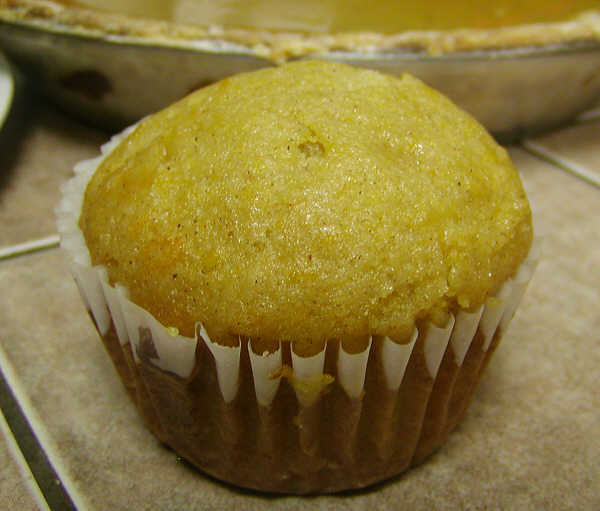
I made squash muffins yesterday. They were a big hit!

They are best made with real cooked and mashed winter squash, either fresh or from the freezer. Just, please, don't use that canned stuff!!


First, cut open your fresh squash and scoop out the seeds and inside. Save the seeds for roasting ;-)


Cook the squash.


There are several ways this can be accomplished.


Baking: Turned squash halves upside down in a pan with a little water and baked for about 45 minutes in the oven. Let cool and scoop cooked squash out of peel.
Boiled: Peel and cut into big chunks. Bring to a boil and cook for only 10 minutes. If it cooks in the water for too long, it will be too wet. Drain well and mash. A potato masher works well for this, as does a ricer.

Or you can cook it in the microwave. I have never tried that as you can only do one piece at a time and I am usually processing many squash at once for the freezer.

When the squash is well done, mash it with a potato masher. What a beautiful bright orange this is! Lots of beta carotene!


Baking is easier but I had squash pies in the oven so I peeled and boiled this.


Squash Muffin recipe:

1 cup squash, cooked and mashed
1/3 cup oil
1/4 cup light corn syrup
3 teaspoons baking powder
1/2 teaspoon cinnamon
1/4 teaspoon nutmeg
1 cup sugar
2 eggs
2 cups all purpose flour
1/2 teaspoon salt
1/2 teaspoon ginger
1/4 teaspoon mace
Raisins (optional)

Makes 1 dozen muffins.

Preheat oven to 350F.


Mix the wet ingredients together in a big bowl. Then mix the dry ingredients together in another bowl. Stir the dry ingredients into the wet ones until well mixed. Spoon into muffin papers or a greased muffin pan. Fill quite full as they don't rise a lot. Bake at 350F for 20-23 minutes until barely starting to brown on top.


Delicious hot with real butter or at room temperature! Good in lunches too!


Sunday, October 10, 2010

Winter Squash From This Year


We grew a lot of winter squash this year. We love squash pies and it's so easy to grow! This year I experimented with a few different varieties. The little orange one are our favourites so far, ambercup. They are small, easy to peel and very sweet.


The most interesting ones were the Hopi indian squash, black and pale gray. I have posted pics of these two types here because I have read folks complain that there aren't any pictures of them on the internet. I know they are rare. These are the original "Three Sisters" squash grown by the Hopi indians. Next year I will have this seed for sale on my site, in addition to a few others. I only have the "Upper Ground Sweet Potato" squash seeds for sale this year because they are the only ones I have with positive seed purity. Next year will be different. I will be growing various types of squash with insect protection and seed purity in mind.


This is the Hopi black growing.


This is the Hopi black after it is aged and ripe. That's an acorn squash next to it to show the large size. It's the only acorn squash I got this year. Just the one.


These are a couple of the Hopi pale gray. It is suppose to be a very good keeper.


The two massive squash at the back of the group in the picture at the right are the "Upper Ground Sweet Potato" squash. It's big, the size of a very large pumpkin! It is suppose to taste more like sweet potatoes than squash. It also grows well in very poor conditions, making it a good squash for our depleted field. It did very well there! I have this seed for sale in my farm store.

The colourful ones in this pile are the "Turban", also called "Turk's Cap" squash. These are a buttercup relative so I am sure they will be dense, sweet and delicious! I grew them because of their colour. I think they will be a good addition to any fall decoration. I didn't grow a lot of them this year but might be growing them for sale next year.


In the group picture behind the "Turban" squash are the four spaghetti squash we grew to try. We have never grown or eaten spaghetti squash before. We are looking at recipes now. We'll see how it goes. If we like it we will grow it again next year. If not, well, it will go the way of the butternut and Ebisu we grew previously and weren't impressed with. We have grown the big blue hubbard before, as well, and like it a lot but didn't grow it this year. I think what we have will be enough and the hubbard, while delicious, is big and hard to peel. An axe does a fair job. A knife...not so much.

These two little, dark green little ones are "Sweet Mama" squash. I only have the two and I am looking forward to trying them. Next year I will plant "Sweet Dumpling". I already have the seeds!


I have several of these. They are big blue hubbard and ambercup crosses. I didn't grow the hubbard this year but I grew it right next to the ambercup last year. Even though I hand pollinated all the flowers last year, there were still some crosses. It'll be good. Both the hubbard and ambercup are good, similar in their sweetness and density, both delicious!


Next year I will be tying both the male and female flowers with netting, I think, to ensure seed purity.
All things considered, we are very happy with this year's squash harvest! It's time to start cutting into a few ripe ones, baking them for the freezer and making a few pies!