Friday, February 26, 2010

Berries and Small Fruits

When I tell folks that I am starting a berry and small fruit field, they always assume I am talking about strawberries, raspberries and blueberries. While I am planning on adding those three standards, there is so much more out there!

I want interesting pie and wine making material. We don't eat much jam but the guys do consume an amazing amount of pie!

One thing I am growing a lot of this year are ground cherries, also called "cape gooseberries". I grew ground cherries last year and they were delicious! I am planting a lot more of them this year.
I have planted chichiquelites, also called garden huckleberries (solanum nigrum). Mine are about an inch tall right now. I have read that they grow into very large and spreading shrubs that are covered with berries. Sounds good to me! They are said to taste like small, very tart blueberries needing a lot of sugar. I can add more sugar for pies and I think that sounds like a good description of something that will make a tasty wine!

A new and interesting berry is the blue honeysuckle berry, or perhaps this is a very old berry that is making a comeback. One variety of this is called a "Haskap" and grow mainly in the western provinces. It looks like a large oval blueberry and it taste similar to a blueberry, although perhaps not as sweet, or so I have read.
In addition to the ones above, I have also collected seed for:

Red Elderberries
Choke Cherries
High Bush Cranberries (viburnam)
Mulberries
Sweet Low Blueberries
Red and Black currents
I have red raspberries and a large patch of wild black raspberries. I am looking for green gooseberries to add, as well.

Another good berry for winemaking is the goji berry. I planted goji berries last spring and grew my own plants.
They are overwintering outside under the snow and are said to be very hardy. We will see when spring comes.I know growing these things from seed will take a few years. I will also actively search out cuttings to root and, perhaps, actually purchase plants from a nursery if they are available.I will be purchasing strawberries this spring but not everbearing. We grew everbearing strawberries for the past couple of years. While they reproduced at an amazing rate, they did not grow a noticeable crop of large berries at any one time. It could have been the cold wet summer, but I have read that the everbearing type produce smaller berries and not all at once. I want enough large strawberries to make a 23 litre batch of wine, so I am planting regular ones this year, and lots of them. I will probably pick them elsewhere this year, giving our new plants the summer to establish themselves.I have planted most of these berry and shrub seeds that I have collected. I planted all of the different types in small trays, covered with plastic. Some I put upstairs in the very warm growing room. Those that I know require winter stratification were planted in trays, covered and put outside on the front porch under the potting bench. Some extra seeds was put into the freezer for storage.

I am still researching hardy berries for wine and pies. I am certain there are more of them out there. Many of these are old heirlooms not grown anymore. We are responsible for the seed we have lost. I want to keep a repository for all the old varieties.


Thursday, February 25, 2010

Edoes and Elephant Ears

Edoes are a member of the colocasia family, as are taro and some elephant ears and they are similar in appearance. If you like those big, tropical leaves in the garden or pond, you can get them by growing edoes, or so I have read.


I first heard about edoes on a pond forum many years ago but didn't see them in the grocery store until more recently. The roots are a common food crop in many tropical countries but that doesn't mean you can eat all taro roots. There are several different members of that family and not all are edible. These, apparently bake like a potato with more flavour and are good with sour cream and butter. Sounds interesting.


When I read about edoes and saw them in the grocery store, I thought it would be an inexpensive way to grow that beautiful, big, tropical plant in my garden or pond. I have always loved the look of the huge elephant ears my grandmother used to grow in her garden. I like taro in the pond too.

The edoe roots are not expensive in the grocery store. I bought one in the fall of 2008 and put it in the basement with the other tender bulbs, waiting on spring to plant it. A mouse ate it. This year I bought a couple of them in January and planted them. I have also read that you can buy taro roots, even black ones, as food in specialty oriental grocery stores for very little money, but I have not followed up on that.


I put the pots on the kitchen floor near the door with my other early potted dahlias and left them. In January, when I planted the edoe bulbs, it was very cold and, since my basement is unheated, my kitchen floor is icy. The other plants in the picture don't seem to mind the icy floor, but I know that colocasia bulbs need heat to sprout and having had elephant ear bulbs before that didn't sprout until July, I didn't expect much.

After they sat there for a few weeks, it occured to me that I could move them to my plant window upstairs where it is very, very warm and they might do better, so I moved them up there. Today there is growth!! I am so pleased!

This sprout is coming up from the side of the pot. I planted them on their side because I wasn't sure which way was up, or down and didn't want to plant them completely upsidedown. I figured that sideways was a safe bet.


I am looking forward to having these beauties in my garden. I have read that elephant ears like shade and do well there so I planted a few bulbs, that I got in a trade, in my shade garden last year. They didn't sprout until July and never got more than a foot tall. I was very dissappointed.

This year I started them early and will put them in the sun. Sometimes people say that certain plants need shade, but those people usually live in much warmer climates. Plants that like some shade down there usually do well up here in the sun.

I read that brugmansias prefer some shade too, so I put some in shade and some in sun last summer. The ones in the sun grew to be twice as big as the ones in the shade and were the only ones to bloom, so I take this shade stuff with a "grain of salt". (I don't know where that saying comes from and have no idea why it means that.)

Here's a brug bloom from last summer:


I have a shade garden that gets some sun in the late evening and I have one the gets sun only in the early morning so I am always on the lookout for true shade plants that are big and interesting.

Eddoes are also known around the world as Arbi, Taro, Nampi and Coco Yam and are used in Indian, Chinese and Caribbean cooking.

Colocasia and alocasia are very similar in appearance but it is the colocasia that like the water. The alocasias do not, so before you put what you have in the pond, make sure you know what it is.

I have also seen yucca roots for sale in the grocery store and might buy one of those for the flower garden too.

Saturday, February 20, 2010

Community Shared Agriculture


Community Shared Agriculture (CSA) is becoming the new age way to farm. It is the only way for a small family farm to stay in business these days. It is the "farm share" concept put into practice. It works the same way as "cow shares", so much in the news lately. Also available are egg share farms and shares for anything else that the government and marketing boards have such a tight hold on.


Basically, the consumer is buying shares of ownership in the farm and are, therefore, part owners rather than simple customers. They can then partake of anything the farm produces for the amount of time that they pay their share of the cost in partnership fees.


This allows a lot more freedom of choice for the consumer and organically grown, fresh produce for much less than it would cost in the supermarket. Depending on the farm and type of partnership shares offered, consumers can have their portion of all vegetables, fruits, fresh herbs, cut flowers, eggs, baked goods, farm soap, dairy products, meats, honey and other things not available to the general public due to legal restrictions and marketing boards. It also gives them access to things they would otherwise no be able to afford in the supermarket.


Although many CSA farms offer only vegetables, some offer egg shares, dairy shares and meat shares sold separately. You usually pay a separate fee for each one. Occasionally, a really good farm will combine everything offered with occasional home baked cookies, pies, jams and pickles processed on the farm. Especially in the months when grown vegetables are more scarce, i.e. early season May and late season October.


It benefits the farmer by allowing him to sell everything he has available, directly from the farm without added costs for sales or transportation. Many of the seasons costs are covered ahead of time by the CSA partnership fees. Most farm shares are paid for up front each year in the spring or the season is divided in half and two payments are made. Either way is good for both the farmer and the consumer.


Ownership in a farm can have a downside. The consumer also takes the same risks as the farmer. Bad weather, drought, insects and other unncontrollable circumstances can reduce the vegetables by quite a bit and destroy some altogether. There is no refund for a poor season, you take the bad with the good, just like any other farm owner does.


Vegetable farm shares usually come in two choices:
One bushel basket per week for a family of four, called "a full share"
Half a bushel per week for a childless couple or single person, called a "half share".
If you have a large family of six or eight adults and nearly adults, you can buy a share and a half, which is a combination of the two, or two full shares. These are just what I have seen this year, in this area. Farms can arrange this any way that is convenient for them and the customers. 


Delivery is not usually included in the price, if it is offered. Some farms deliver and some require you to pick up your shares, some with substitutes offered on hand. Many folks like coming to the farm to pick up their baskets. This gives them the opportunity to see what is produced first hand and to chat with the farmer and other partners. Some farms have other items for sale to the public that can be bought when farm shares are picked up.


Farm shares usually start in late May or early June and continue through until late September or early October with a basket every week of whatever the farm is producing at that time. Usually 18-19 weeks are offered, with extensions on either end if growing conditions are favourable. Obviously you won't get everything offered every week, as it is all locally grown and seasonal for your area. Farms that sell shares usually have a greenhouse or cold frame(s) to start early and end late, thereby giving their farming partners the fresh vegetables as long as possible.

I have considered starting a CSA farm. I would include more than just vegetables, hoping to compensate for the occasional poor vegetable selection with other things, like handmade soap, candles, baked goods, jam, pickles, etc. 

Planning would be a large part of the work. Planning and planting for a specific number of weekly boxes and limiting the customer base to just what we are able to supply. Making sure there is something growing and ready for each week of the season and preparing to fill out the boxes with everything the farm produces, i.e. soap, candles, herbs, fresh flowers, farm crafts, etc. 

I think Fort Nelson would benefit a lot from a CSA farm in the area. At this point in time, however, I am planning on using all of my available gardening space to grow food for the Food Bank. 


Friday, February 19, 2010

Sunday, February 14, 2010

Grow Sweet Potatoes in the North


We love baked sweet potatoes with real butter! I buy them occasionally when I feel like a treat for dinner. It was only last year that I began to research how to grow them myself and if it would be possible up here in the great white north.

It is, indeed, possible but does take some knowledge and a bit of preparation.


Sweet potatoes are grown from "slips" which are live cuttings from a sweet potato vine. You can buy sweet potato slips from nurseries here, shipped to you at planting time in the spring. You can also grow your own slips now and have them ready to plant out as soon as all danger of frost is past.

Sweet potatoes do not take frost so cuttings must be held indoors, in a cold frame or a greenhouse until time to plant into the garden with the other tender vegetables.

Because they like very warm soil, it is a good idea to prepare a raised row for them. Raised beds warm up faster in the spring. This can be an planter or just a row in your regular garden that has been piled high.


Another way to warm the soil early and almost a must for sweet potatoes is using black plastic mulch. The black mulch will quickly get hot in the spring sun and the soil underneath will be a good temperature for your sweet potato cuttings when they are ready to plant. I have read that the big box hardware stores, like HD and Rona, get shipments of wood covered with large sheets of black plastic which is discarded. I have both of these stores near me and plan to ask them if I can take some of this off their hands.

Black plastic mulch can be used to kill weeds in fields before planting in the spring, as well. Cover the field with it and it will quickly become so hot underneath that it cooks the grass, weeds and weed seeds in the ground, or so I have read. I am hoping to get enough black plastic this spring to try this or, at least, enough to cover my planned sweet potato rows.


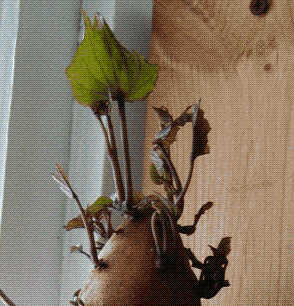
To grow your own sweet potato "slips", you need whole sweet potatoes. Stick three toothpicks into the potatoes and suspend them in water. If they are warm enough they will root in the water and grow sprouts. Its these sprouts that you can cut off, root inside and plant in the garden in spring. The sweet potato cuttings or "slips" will quickly root and grow into large vines in no time. It gets big quickly. As the vines grow inside, while you are waiting for spring, you can continue to cut them into smaller pieces and root those, as well.

It is very important to keep the sweet potatoes warm while rooting. I bought two last year from a small grocery that were labelled "Ontario grown". Figuring these would be the short season variety I would like to try, I bought a couple. I suspended them in water for months and they didn't root until it got warm in the house in early summer. I kept them by the back door and they were always cold.


This year I bought three from a large grocery. I don't know if they are northern ones or not but I will try them anyway. I put these in the room above the wood stove and they rooted quickly. All three are well rooted and one has sprouted.


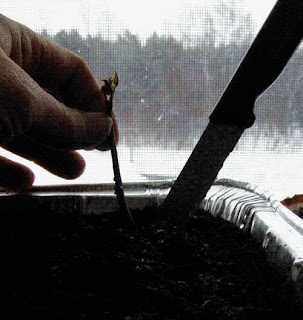
This will be my sweet potato sprout rooting tray. It is just potting soil from the store kept slightly damp at all times. There is one sprout that is big enough to cut and root. Always use a knife when taking any cuttings. If you use clippers or scissors you might crush the bottom so much that it cannot take up water.


This is the one cutting big enough to root. Pick ones that have a couple of leaf nodes on the stem that can be planted under the soil. This is usually where roots grow on cuttings, although not always. Some plants grow roots all along the stem, i.e. brugmansias.


Remove the bottom leaves or they will rot in the soil.


Use the knife to make a hole for the cutting and put it in the hole, filling in with soil and covering the leaf nodes If you have rooting hormone you can use it on these sprout but I don't think it will be necessary. Keep the sprouts very slightly damp until you see new leaf growth.

I am hoping to grow enough sprouts to fill several trays with growing plants before spring.


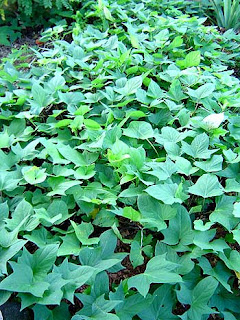
Sweet potato vines grow across the ground while the sweet potatoes themselves grow under the ground, like regular potatoes. They will cover a large patch quickly in warm soil.

(Sweet potatoes are NOT potatoes. Its a different plant altogether.)
Harvest your sweet potatoes in the fall before frost. Do not wait until frost takes the vines or the sweet potatoes will not be as good.

After harvesting your sweet potatoes you will need to let them cure for several weeks. This is the time the starches are turned to sugars. If you eat them before they have cured, they will not be as sweet. Put them on a screen, out of the sun, in a place where they will not freeze, where they can dry for weeks. They will keep until the following year if stored cool and dry, but not too cold.

You can grow your own sprouts for the following year from some of these potatoes you have grown. You can also take cuttings from the vines to grow indoors until time to cut them up into small pieces for next spring.

This will be the first time I have grown sweet potatoes. I am very excited about it! It will be one of my pet projects for this year.


Saturday, February 13, 2010

Making Quark

The delicious soft cheese that I made in my previous soft cheese post is called "Quark". I made quark and didn't even know it!

(This is the address of the above link. Some folks are having trouble with it. If it doesn't work for you, you can just copy and paste this address:
http://providence-acres.blogspot.com/2010/02/making-soft-cheese.html)

Here are the directions. I am going to start another batch today!

Ingredients
•1 Gallon 2% milk
•8 oz cultured buttermilk

Directions
1.For making homemade quark you'll need about 2 days. With this recipe you can make about 1 kg ( little over 2 pounds quark). The quarks texture is depending on how long you drain the quark. The longer you drain, the drier the quark. If it got to dry just add some milk or whey for making it smooth again. Important: Only use very clean utensils.


2.Pour milk ( in my experience 2 % or higher works best) in a large bowl. Use a plastic bowl with lid. No stainless steel bowls! Add buttermilk and stir, using a wooden spoon.

3.Cover bowl with lid and let stand at room temperature (72 F) for 2 days. Do not move the bowl to achieve best results.

4.After 2 days you've got soured milk. Place bowl (still covered with lid) on a dishtowel lined baking sheet. Put it in the middle rung of the oven. Set temperature to just under 150 F and heat for 2-4 hours or lower temp and leave overnight. Now the whey splits from the quark. The whey is yellowish-green in color.

5.Line a strainer with a cheesecloth and put in a bowl. Using a slotted spoon, fill quark in strainer.

6.Tie cheesecloth and strain quark by hanging it in a cool place. (the cooler the better) Keep the whey for a healthy drink if desired. Whey can also replace water in any baking recipe. It contains a lot of vitamins and goodness from the milk.

7.After the quark is drained, store it in the refrigerator for up to 6 days, depending on the room temperature where the quark was drained.


I'm off to sour some milk!

Here are a few recipes, all untried by me (but not for long!)


Quark cheesecake:
Ingredients:
•1 store bought frozen pie shell
•2 eggs
•1 1/2 cups Quark
•1/2 cup confectioners sugar
•2 Tbsp whole milk
•2 tsp vanilla extract
Preparation:
Preheat oven to 375

Whisk eggs. Using a spoon, mix in Quark, sugar and vanilla.

Pour mixture into a pie shell. Bake until the mixture is set in the middle, about 1 hour.

Let tart cool. Serve chilled. Top with berries.


Quark Crumb Bars

Uses one 9 x 13 pan

Combine in a mixing bowl:

16 ounces quark
1 egg
1 cup sugar
1 t. vanilla
1/2 cup dried blueberries, cherries or raisin
Mix well and set aside.

In a second bowl combine: (mixture will be crumbly)

1 cup butter or margarine
3/4 cup sugar
1 t. vanilla
1 egg
1/4 t. salt
3 1/2 cups white flour
Blend with a pastry blender. Measure out 2 1/2 cups of crumbs. Pat into a greased 9x13 glass baking dish. Push up about 1/2 inch of dough around the edges of the pan.

Bake at 350 degrees for 10 - 12 minutes

Pour quark mixture over baked crust. Spread evenly. Incorporate 1/4 t. baking powder into remaining crumbs. Spoon evenly over quark. Pat down very slightly. Bake 30 -35 minutes at 350 degrees. Cool before cutting
.


Roasted Red Pepper Dip

Ingredients2 red bell peppers, halved and de-seeded
4 ounces Quark
2 tablespoons sweet chili sauce
fresh ground black pepper

Directions
Place the peppers skin side up under a hot grill until the skin is black (approx. 20 mins). Place them in a sandwich bag, seal it and leave for 10 minutes. Now you should be able to remove the charred skin really easily. Place all ingredients in a blender and process until smooth. Chill in the fridge for 2 hours before serving, that allows the flavours to develop and blend. Serve as a dip with vegetables or bread.


Quark Tirmisu
Ingredients
24 dried sponge cake fingers
500 g Quark
4 tablespoons confectioners' sugar
150 ml strong coffee
60 ml Kahlua
3 cups mixed berries
100 g chocolate, finely grated

Directions
Combine quark and sugar in a bowl. Set aside.
Combine coffee and kahlua in a separate bowl.
Prepare 6 large,clean wine glasses. In the bottom, place one large tablespoon of the quark mix. On top of this place a medium sized amount of berries, just enough to cover.
Break the sponge finger in half. Dip 4 halves into the bowl of coffee mix until soaked through. Remove and place on top of berries. Add a pinch off chocolate. Repeat until the glass is filled, at least twice.
Top off with an extra layer of quark, a few berries and a generous grating of chocolate. Repeat with the rest of the glasses and chill until serving.


Quark pasty sweet rolls

NOTE: The vanilla cream flour can be replaced by mixing together 1 teaspoon vanilla sugar and 1/4 cup potato or wheat flour

Dough
1 cup whole milk
3/8 cup softened butter
1/4 ounce dry yeast (1 packet)
1 egg
1/2 cup superfine sugar
1/2 teaspoon salt
5 cups wheat flour

Filling
1/4 cup butter
1 large egg
2 tablespoons sugar
1/2 cup Quark
1/4 cup vanilla cream flour

Icing
1/2 cup confectioners' sugar
3 teaspoons fresh orange juice or lemon juice
1 dash water, to desired consistency

Directions
Prepare filling by mixing ingredients into a smooth paste. Refrigerate until needed.

In a saucepan over low heat, warm the milk and butter to about 40C/104°F.

In a bowl, crumble the yeast into the warm milk and butter mixture. Add sugar, salt and egg. Mix together well until the yeast is dissolved.

Add flour gradually until the dough forms a ball. Add more flour only if it's still sticky and add only a little at a time.

Knead dough for about 5 minutes until smooth and elastic.

Place a towel over the bowl and let the dough double in a warm, draft-free place for about 30 minutes to 1 hour [warming the oven to ~40C/100F works very well as a proofing box].

Turn dough out onto lightly floured work surface. Gently shape dough into rough rectangle with long side nearest you. Lightly flour dough and roll into a 16-inch x 12-inch (40cm x 30cm) rectangle.

Spread filling on the dough leaving a 1cm/.5in border on the far edge.

Beginning with long edge nearest you, roll dough into taut cylinder.

Firmly pinch seam to seal and roll cylinder seam-side down.

Very gently stretch and roll to cylinder of even diameter and 18-inch/45cm length; push ends in to create even thickness.

Using a sharp serrated knife and gentle sawing motion, slice cylinder in half, then slice each half in half again to create evenly sized quarters. Slice 3,8cm/1.5in pieces from the rolls and place into a rectangular pan using a spatula.

Cover with a towel and allow to rise for about 30 minutes while the oven warms to baking temperature.

Make icing.

Bake in a pre-heated oven at 200-225C/390-435F for about 13-15 minutes.

Cut apart and drizzle icing over the tops.

Monday, February 8, 2010

Setting Up A Freshwater Aquarium


Today I am getting some fish for our new aquarium. I have had many aquariums and a pond in the past, all with goldfish and some koi in the pond. I like goldfish and koi. Many people think that goldfish are dirty and a lot of work. They are no work at all if the tank is set up properly and you have all the ingredients for a balanced eco system.
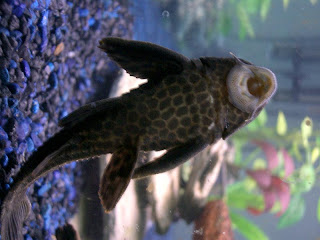
In the past I put the fancy-tailed goldfish, together with a plecostamus, in the tanks. This has always worked well for me. The plecostamus (called pleco) keeps the tank and everything in it shiny clean, eating all the algae, everywhere.


I had this arrangement for years and never once had to clean algae from the walls of an aquarium. They were always squeaky clean. I am planning on that arrangement for this one. The key to keeping both together successfully is water temperature. It needs to be above 70F to keep the pleco happy and below 75F to keep the goldfish happy. So I am going to need a heater set to about 72F-73F, since we turn the heat off at night here. The goldfish are happy in much cooler temps and would be fine alone. The pleco would suffer in the cold water at night. Finding a heater that does not have a preset temperature of 78F is going to be difficult. All the new ones are preset. I will have to find an older heater second hand. It is cheaper that way, anyway.

I got this aquarium together with the light, filter and a heater (which did not work) in exchange for soap and brown sugar body scrub. I also aquired a much larger tank, canopy, light, large filter and a few small tanks in the same trade. I am planning on using these as mini greenhouses in the garden. Unfortunately, I don't have room for the larger aquarium anywhere in the house. Its 3' long! I might keep it in the basement in case I put in a small pond outside and need a place to overwinter a few goldfish. I have done that in the past and it worked very well. For now it is staying empty and out of the way.
Since we live in the country, we are on a well, therefore no chlorine or chlorimines. It would be a shame to have this advantage and not have an aquarium and pond! If you are on city water, you will have to add dechlor to every drop that you put in the aquarium or pond. You might get away with letting it set out overnight if your city only adds chlorine, but if chlorimines are added, you will have to use declor to get rid of them. Chlorimines are a blend of chlorine and ammonia, specifically made so that it will not evaporate. Most large cities are adding it to their water now.


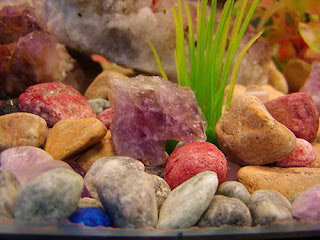
This is the tank that I have set up. I put natural large and porous gravel in the bottom, along with some polished amethist and some raw amethist.


I have quite a bit of it from the little span of time we spent in Thunder Bay, near a large amethist mine. Raw amethist can be found just laying around on the ground. I have a bucket of small pieces like these and a small bag of the polished ones.


I chose this particular gravel for it porosity. The more surface area you have, the greater amount of symbiotic bacteria you will grow. We want this bacteria in the tank and filter. It would grow even better if this porous gravel were in a filter or waterfall where the aerated water is flowing over it. This is the reason lava rock is popular in aquariums, because of the porosity and effectiveness in growing a good bacteria culture. I know it seems as though I am obsessed about cultures lately with the buttermilk and cheese and wine making. Maybe I am. (Is there anything wrong with that?)

There are two different bacteria that we want growing in our tank and filter. Nitrosomous and Nitrobacter. One takes in the ammonia from the fish wastes and spits out nitrites. The second takes in the nitrites and spits out nitrates, which the live plants absorb and need to grow. (Its nitrogen, You know...the "n" in npk... the first number in 10-10-10.) Hence the need for live plants. Without them the nitrates will build up in the water and you will have to do small water changes.

The bacteria will grow on all the surfaces in the tank and in the filter. You will get the largest number in the filter where the water is more oxygenated as it flows over the filter media. You want as many surfaces as possible. This is the reason poly fil type stuff makes good filter media for an aquarium. It is about as multi-surfaced as you can get. This is good for an aquarium but not so good for a pond. A pond will quickly overwhelm something as tiny as poly fil. Unless you want to be cleaning the filter media every couple of days you will need to use something not quite so small. Lava rock works well for this, as do nylon dish and bath scrubbies. (There is no need to BUY filter media!) It cannot be organic, however, or it will decay. Plastic and nylon are excellent.

Set it up properly and balanced and you won't have to do a thing, except add water as it evaporates and feed the fish, and maybe keep the cat from fishing in it. (Use a lid!)


This has been going on all afternoon.


The colourful background is just plastic wallpaper that tapes onto the outside of the back of the tank. How easy is that! They sell it by the roll at aquarium stores. It makes the whole thing so beautiful and its cheap too! The plants in there now are plastic but I will be adding real plants.

If you have live plants you will also need a light for them. They won't last very long without light. Most aquarium plants have to be replenished from time to time, especially if you have goldfish or koi, because the fish will eat them. Plants with thicker, larger leaves seem to last longer. One that I like is Creeping Jenny (Lysimachia nummularia). It is not sold as an aquarium plant and a lot of you will have it growing in your garden. It makes an excellent plant in the water, just bareroot and held in place with a rock. It grows and grows in an aqurium and the fish do not eat it. You can also use it to hide pot rims in the pond or cover a stream edge. Watercress is another good one, but the fish do eat it. You can too. It makes a good salad. I am considering buying a bunch of cut watercress at the grocery store, rooting the pieces and growing it out of the back of the aquarium. It will give the fish some healthy natural food to eat in addition to the commercial fish food I usually give them.

Since the aquarium is in front of a window I can grow plants out of it. There is no direct sunlight. The window is under the porch overhang of about 6', facing east. Direct sunlight would cause too much of an algae growth but this indirect light will be good for some houseplants. I don't know if it will be enough for watercress or not, but I will try it.

I set up the tank and started the filter about a week ago and left it empty of life. This gives the bacteria time to grow. I put in just a drop of ammonia at the beginning to get the bacteria started as it needs something to eat. If you do not have pure ammonia, you can always use a drop or two of pee. It is, after all, the reason you want the bacteria grow in the first place. They have been growing in there with the filter running for a week. Two weeks would be ideal but I am getting tired of looking at an empty tank. I bought these two little guys today.


They are very little right now but they will grow to two or three times their size in a year or so. These two plus a pleco will be about all the tank will safely hold. The rule for aquariums and ponds is this: one inch of fish, tail included, for every gallon of water. I might add one more goldfish with the pleco. If you have a better than average filter system and stronger pump than needed, you can get away with more, but not a lot more. In the long run the fish will suffer and become stressed and you will have to do constant water changes to keep the ammonia and nitrate levels down.

Stressed fish are sick fish, eventually. Goldfish and koi and shubunkins are all carp, so I am treating them all the same. Carp have a natural slime coat that protects them from disease and parasites that naturally live in the water. When they are stressed their slime coat lessens. Stress can be caused by anything, i.e. swings in water temperature or water that is too warm (above 75F), danger, poor water quality, moving into a new home or anything else causing an unhappy fish. Another thing that causes stress for carp is lack of sleep. Yes, they sleep at night but they have no eyelids. In their natural habitat it is dark at night and they don't need them. Turn the light off when you go to bed. Sometimes fish get parasites and diseases anyway, for no apparent reason but if they are healthy and happy you will see a lot less of it. A great deal of this can be prevented by using salt. I always reach for the salt before using any other remedy. Always use pure rock or aquarium salt (sodium chloride).

Freshwater aquariums benefit from being salted a small amount. It prevents parasites like ich, worms and other nasties and helps to keep a thick slime coat on the fish. It should be added gradually over a few days to get the fish and your lovely bacteria culture used to it. It may harm your plants. Some plants will tolerate a little and some will not.

To add only a small amount for general health, use 1/4 teaspoon per gallon of water, added gradually over a three day period. Dissolve the salt in some water from the tank in a glass before pouring it into the aquarium. If you have a lot of plants and still want to add some salt, use less. It will still benefit your goldfish.

Keeping goldfish is a rewarding and enjoyable hobby, or it should be. If you are finding your pond or aquarium to be a lot of work, perhaps you need to lessen the load somewhat or set it up differently. If it is not fun and interesting, why do it?

Saturday, February 6, 2010

Making Soft Cheese

I finally made my own cheese. Its delicious, creamy soft cheese. I didn't really mean to make cheese. What I mean is, it didn't start out to be cheese. I was making buttermilk and left it so long on the counter that it soured. You can read how to make buttermilk in a previous post.

It didn't make good buttermilk. It soured instead. I don't know why. After it had already soured, I threw in another bit of buttermilk and left it another day, but it was already too late. It had clabbered or curdled.


I left it on the counter for another full day until it had separated completely with curds on the top and a clear, greenish liquid, called whey, on the bottom. I only left it that long because I worked that day and was just too busy to deal with it. By the time I finally got around to doing something with it, the curds at the top were fairly solid. This is how cottage cheese is started.


My kitchen helper watched me closely from a chair by his usual perch on the kitchen table. He likes anything to do with dairy products, although we don't give him much of it. He has a sensitive digestive system.


Cottage cheese is made with this curd that is heated to 190 and strained. I didn't heat this up because I was just too busy at the moment making cabbage rolls, baking cookies and making lemon squares all at the same time. One more thing would have just been too much for me.


I was reluctant to discard this wonderful stuff. It tasted great and smelled sweet, so I drained it in cheesecloth for a few hours to see what I had. I tied the two ends around a wooden spoon and suspended it over a bowl on the countertop.


This kind of soft cheese can be made without rennet. Rennet is necessary to make many soft cheeses and any hard cheese.


I left it to drain for a few hours. I should have left it longer but I am just too impatient. Hmmmm... Maybe I am too impatient to be making cheese.


I still had the whey in a jug. Whey is great stuff, full of things that are very good for you. You can even buy powdered whey in health food stores. It can replace any liquid used in baking.

I put it in the freezer. I put some plastic wrap over a couple of tiny muffin pans, filled them and set them in the freezer. When they were hard, I put the frozen whey pieces together in a large freezer bag. I have got to get some ice cube trays!!


At this point Chisel lost interest and decided to take a bath.